Difference between revisions of "Quick Guide: BMP-Activities completed tab"
m |
m |
||
| Line 1: | Line 1: | ||
| − | |||
| − | |||
The following is a quick guide to complete the [[Guidance for completing the TMDL reporting form#BMPs-activities completed worksheet|BMPs-Activities completed tab]]. | The following is a quick guide to complete the [[Guidance for completing the TMDL reporting form#BMPs-activities completed worksheet|BMPs-Activities completed tab]]. | ||
Revision as of 17:50, 3 February 2015
The following is a quick guide to complete the BMPs-Activities completed tab.
Gathering BMP information
STEP 1: Inventory BMPs that
- are treating water discharged to waterbodies with an approved TMDL as indicated in your form
- reduce pollutants prior to discharge from your MS4
- you described in your Compliance Schedule on your TMDL Attachment Spreadsheet at the time of application
- have been operational since the baseline year of that TMDL but not prior to the baseline year
- meet criteria for category 1 or category 2 BMP types
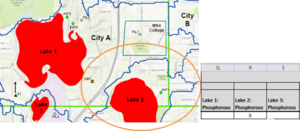
STEP 2: Identify the location of your MS4 in relation to watershed boundaries and the TMDL study area
STEP 3: Plot the location of inventoried BMPs for which you have geographic locations
STEP 4: Determine from which TMDL the BMPs reduce pollutants
Enter BMP information into the spreadsheet
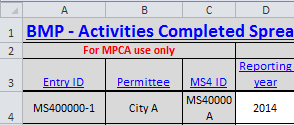
Example data shown for a rain garden in City A, for more details see examples.
STEP 5: Enter the reporting year by using the drop down menu in column D. Columns A through C autofill.
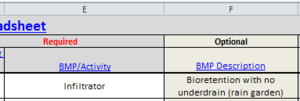
STEP 6: In Column E, enter your first BMP, selecting the appropriate category from the dropdown box. Complete Column F (dropdown) if desired. For guidance, click here.
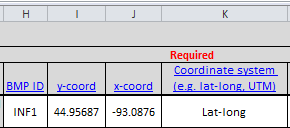
STEP 7: Complete columns H, I, J, and K if they did not autofill. These are ID number and locational coordinates for the rain garden (INF1). For guidance, click here.
STEP 8: Complete Columns L and M. From the dropdown in Column L select the owner/operator of the BMP. Column M autofills if you are the owner, otherwise enter the name of the owner/operator of the BMP. For guidance, click here.
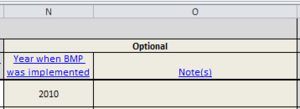
STEP 9: Complete Columns N and O if desired. This rain garden was installed and was operational in 2010. City A enters “2010” in Column N. No comments are added to Column O.
STEP 10: Associate the BMP with TMDLs. City A determines that the rain garden is reducing pollutants draining to the Lake 2 Phosphorous TMDL. City A indicates this with an “X” in Column Q. For guidance, click here.
