![]()
Difference between revisions of "Construction stormwater photo gallery - Outlet energy dissipation"
m |
m |
||
| Line 2: | Line 2: | ||
==Examples of well implemented outlet energy dissipation practices== | ==Examples of well implemented outlet energy dissipation practices== | ||
| − | <gallery caption="These are some examples of good outlet energy dissipation practices." widths="180px"> | + | <gallery caption="These are some examples of good outlet energy dissipation practices. Click on an image for more information." widths="180px"> |
File:Dissipation good 2.JPG|alt=vehicle tracking bmp | File:Dissipation good 2.JPG|alt=vehicle tracking bmp | ||
File:Dissipation good 3.JPG|alt=vehicle tracking bmp | File:Dissipation good 3.JPG|alt=vehicle tracking bmp | ||
| Line 11: | Line 11: | ||
==Examples of poorly implemented outlet energy dissipation practices== | ==Examples of poorly implemented outlet energy dissipation practices== | ||
| − | <gallery caption="These are some examples of poor or non-existent outlet energy dissipation practices." widths="180px"> | + | <gallery caption="These are some examples of poor or non-existent outlet energy dissipation practices. Click on an image for more information." widths="180px"> |
File:Dissipation bad 1.JPG|alt=vehicle tracking bmp | File:Dissipation bad 1.JPG|alt=vehicle tracking bmp | ||
File:Dissipation bad 2.JPG|alt=vehicle tracking bmp | File:Dissipation bad 2.JPG|alt=vehicle tracking bmp | ||
Revision as of 14:06, 10 January 2017
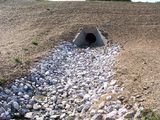
This page provides photos illustrating well implemented and poorly implemented outlet energy dissipation practices.
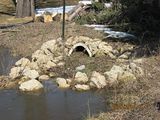
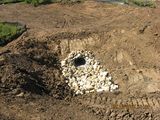
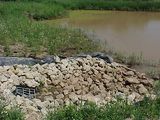
Examples of well implemented outlet energy dissipation practices
- These are some examples of good outlet energy dissipation practices. Click on an image for more information.
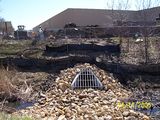
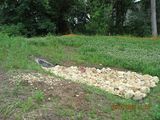


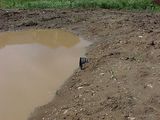
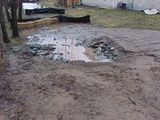
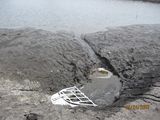
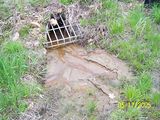
Examples of poorly implemented outlet energy dissipation practices
- These are some examples of poor or non-existent outlet energy dissipation practices. Click on an image for more information.