Difference between revisions of "How to create a WMAt account"
m |
m |
||
| Line 4: | Line 4: | ||
1. Select the '''Create WMAt User Account''' button at the bottom of the login screen | 1. Select the '''Create WMAt User Account''' button at the bottom of the login screen | ||
| + | |||
[[file:Step 1.png|700px|alt=image for WMAt tool]] | [[file:Step 1.png|700px|alt=image for WMAt tool]] | ||
| Line 15: | Line 16: | ||
5. Select '''Register Account''' button, you will see this screen | 5. Select '''Register Account''' button, you will see this screen | ||
| + | |||
[[file:Step 3.png|700px|alt=image for WMAt tool]] | [[file:Step 3.png|700px|alt=image for WMAt tool]] | ||
| Line 20: | Line 22: | ||
7. Select link in confirmation email. It will bring you to this screen | 7. Select link in confirmation email. It will bring you to this screen | ||
| + | |||
[[file:Step 4.png|700px|alt=image for WMAt tool]] | [[file:Step 4.png|700px|alt=image for WMAt tool]] | ||
| Line 31: | Line 34: | ||
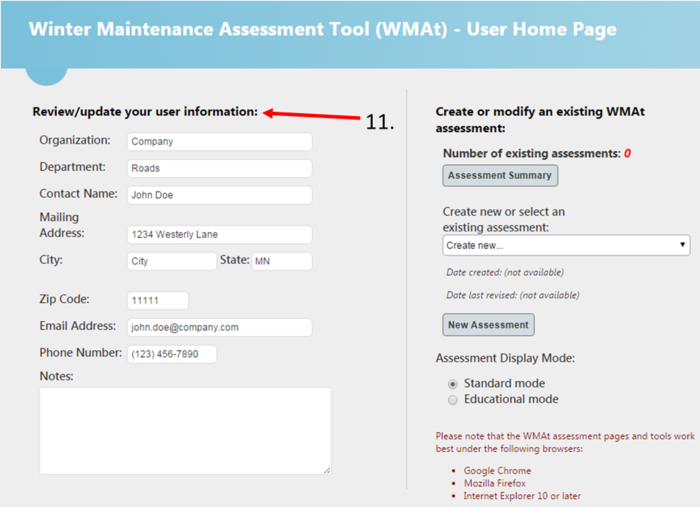
10. Enter your user information on the User Home Page | 10. Enter your user information on the User Home Page | ||
| + | |||
[[file:Step 7.png|700px|alt=image for WMAt tool]] | [[file:Step 7.png|700px|alt=image for WMAt tool]] | ||
Revision as of 14:18, 29 January 2016
This page describes a step-by-step procedure for creating an account for the Winter Maintenance Assessment tool (WMAt).
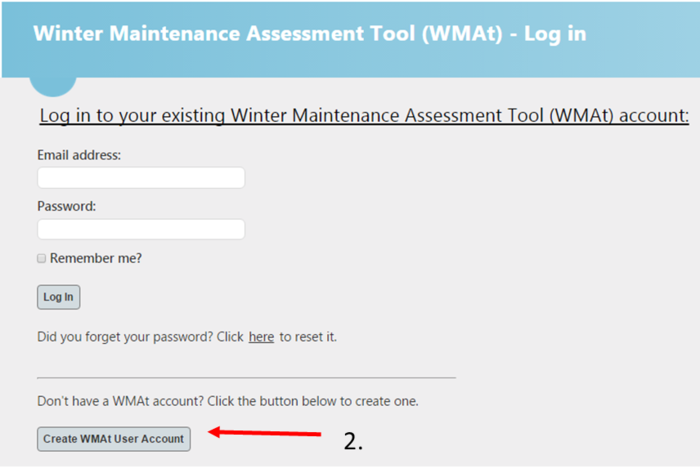
1. Select the Create WMAt User Account button at the bottom of the login screen
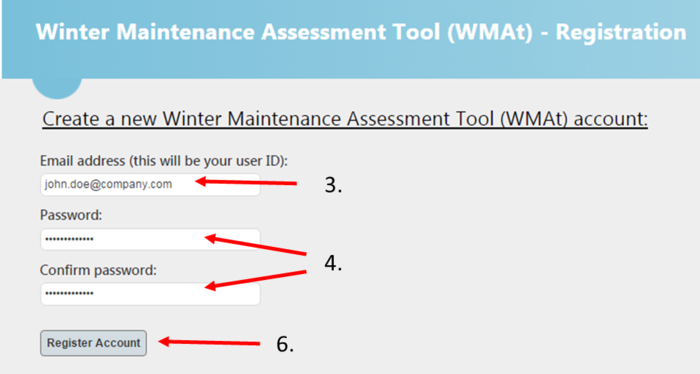
2. Enter your email address
3. Create and confirm a password
4. Write down your account information and remember to bring it to class
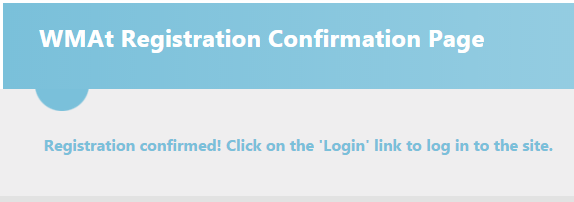
5. Select Register Account button, you will see this screen
6. Log in or check your email for a confirmation email. If you do not see it, check your Junk or Spam folder for an email from webmaster@limno.com.
7. Select link in confirmation email. It will bring you to this screen
8. Select the Home or Log in button on the top right corner of the page
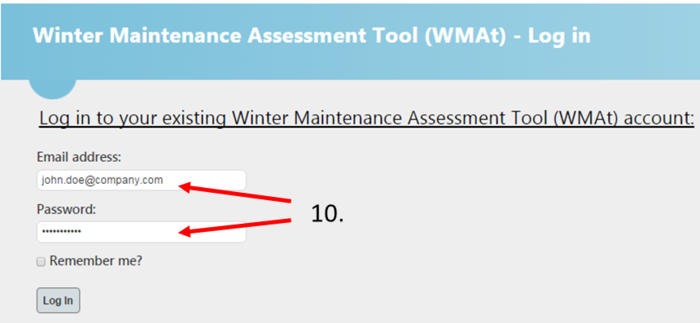
9. Log in to your new WMAt account
10. Enter your user information on the User Home Page
