Example for using BMPs in series in the MIDS calculator
This page provides an example application of the Minimal Impact Design Standards (MIDS) calculator for several BMPs in series. Examples for individual BMPs can be found at MIDS calculator sample exercises.
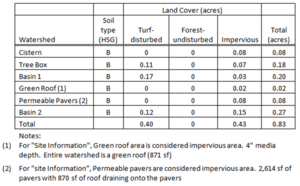
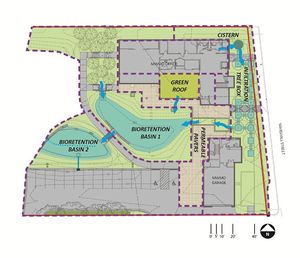
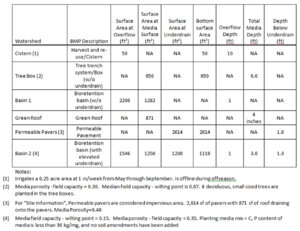
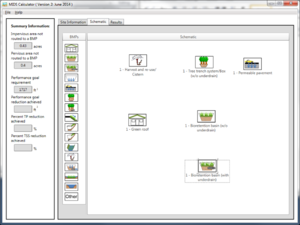
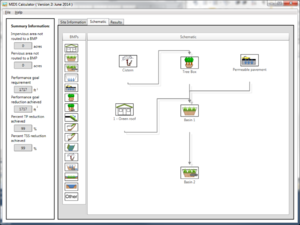
The Mississippi Watershed Management Organization office in northeast Minneapolis contains multiple BMPs that are routed to one another before the water reaches the Mississippi River. This site contains a cistern that receives runoff from part of the building’s roof and is used to irrigate a 0.25 acre area, a green roof, a series of tree boxes that treat overflow from the cistern, permeable pavement, a bioretention basin without an underdrain and a bioretention basin with an underdrain. The flow of water and location of the BMPs are displayed in the schematic. All watershed information and BMP parameters for this site are displayed in the tables below. This example will show how to enter all of the BMPs, route them to the appropriate downstream BMP and view the results.
Step 1: Determine the watershed characteristics for the entire site. For this example we have a 0.8 acre site with 0.43 acres of impervious area and 0.37 acres of turf cover in B soils.
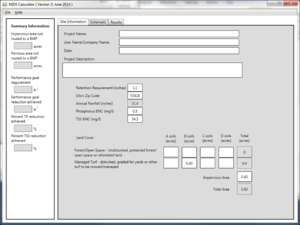
Step 2: Fill in the site specific information into the Site Information tab. This includes entering a Zip Code (55418 for this example) and the watershed information in Step 1. Zip code and impervious area must be filled in or an error message will be generated. Other fields on this screen are optional.
Step 3: Go to the Schematic tab and drag and drop the BMPs into the Schematic Window. BMPs in this example include a Harvest and re-use/Cistern, a Tree trench system/Box (w/o underdrain), a permeable pavement BMP, a green roof, a bioretention basin without an underdrain and a bioretention basin with an underdrain.
Step 4: Open the BMP properties for the Cistern by right clicking on the Harvest and re-use/Cistern icon and selecting Edit BMP properties, or by double clicking on the Harvest and re-use/Cistern icon.
Step 5: Determine the watershed characteristic for the cistern. For this example 0.08 acres of impervious area is draining to the cistern. Enter in the watershed information, change the name to cistern and route to the Tree trench system/Box BMP.
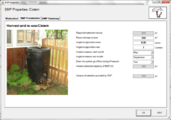
Step 6: Enter in the BMP design parameters into the BMP parameters tab. Harvest and re-use/Cistern requires the following entries:
- Reuse storage volume - equal to the cistern volume of 500
- Irrigation application area - 0.25 acres
- Irrigation application rate - 1 inch/week
- Irrigation start month - May
- Irrigation end month - September
- Does the system go offline during off season – Yes
Step 7: Close the BMP properties window for cistern by clicking OK.
Step 8: Open the BMP properties for the tree box by right clicking on the Tree trench system/Box (w/o underdrain) icon and selecting Edit BMP properties, or by double clicking on the Tree trench system/Box (w/o underdrain) icon.
Step 9: Determine the watershed characteristic for the tree box. The watershed parameters for the tree box include a 0.18 acre site with 0.07 acres of impervious area and 0.11 acres of pervious turf area in type B soils. Enter in the watershed information. Change the name and route the BMP to the bioretention basin without an underdrain.
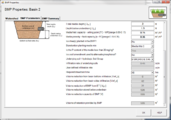
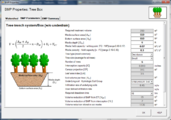
- MIDS calculator screen shots for watershed tabs for BMPs used in this example. Click on an image for enlarged view.
Step 10: Enter in the BMP design parameters into the BMP parameters tab. Tree trench systems require the following entries.
- Surface area at engineered media surface - 650 square feet
- Bottom surface area (area at media-soil interface) - 650 square feet
- Media depth - 6 feet
- Media field capacity minus wilting point - 0.07 cubic feet per cubic foot
- Media porosity (f) minus field capacity - 0.30 cubic feet per cubic foot
- Tree type - Deciduous
- Tree Size - Small
- Number of Trees - 6
- Underlying soil – Hydrologic Soil Group which is SM (HSG B; 0.45 in/hr) from the dropdown box
- Required drawdown time (hrs) - 48 from the dropdown box
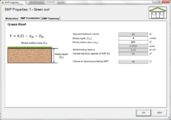
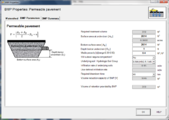
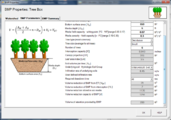
- MIDS calculator screen shots for BMP Parameter tabs for BMPs used in this example. Click on an image for enlarged view.
Step 11: Close the BMP properties window for tree box by clicking OK.
Step 12: Open the BMP properties for the permeable pavement by right clicking on the Permeable pavement icon and selecting Edit BMP properties, or by double clicking on the Permeable pavement icon.
Step 13: Determine the watershed characteristic for the permeable pavement. The watershed parameters for the permeable pavement include a 0.08 acre site with all of it being impervious. Enter in the watershed information. Change the name and route the BMP to the bioretention basin without an underdrain.
Step 14: Enter in the BMP design parameters into the “BMP parameters” tab. Permeable pavement requires the following entries.
- Surface area at underdrain - 2614 square feet
- Bottom surface area - 2614 square feet
- The depth below the underdrain - 1 foot
- The media porosity - 0.4 cubic feet per cubic foot
- Will the soil require compaction – No
- Underlying soil – hydrologic soil group - 6 SM (HSG B, 0.45 in/hr)
- Required drawdown time - 48 hours
Step 15: Close the BMP properties window for permeable pavement by clicking OK.
Step 16: Open the BMP properties for the Basin 1 by right clicking on the Bioretention basin (w/o an underdrain) icon and selecting Edit BMP properties, or by double clicking on the Bioretention basin (w/o an underdrain) icon.
Step 17: Determine the watershed characteristic for the bioretention basin without an underdrain. The watershed parameters for Basin 1 include a 0.2 acre site with 0.03 acres of impervious area and 0.17 acres of pervious turf area in type B soils. Enter in the watershed information. Change the name and route the BMP to the bioretention basin with an underdrain.
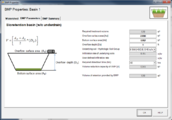
Step 18: Click on the BMP Parameters tab and enter the BMP design parameters. Bioretention basin without an underdrain requires the following entries.
- Overflow surface area - 2200 square feet
- Bottom surface area - 1282 square feet
- Overflow depth - 1 foot
- Underlying soil – Hydrologic Soil Group - SM (HSG B; 0.45 in/hr) from the dropdown box
- Required drawdown time (hrs) - 48 from the dropdown box
- MIDS calculator screen shots for BMP Parameter tabs for BMPs used in this example. Click on an image for enlarged view.
Step 19: Close the BMP properties window for Basin 1 by clicking OK.
Step 20: Open the BMP properties for the Basin 2 by right clicking on the Bioretention basin (with an underdrain) icon and selecting Edit BMP properties, or by double clicking on the Bioretention basin (with an underdrain) icon.
Step 21: Determine the watershed characteristic for the bioretention basin with an underdrain. The watershed parameters for Basin 2 include a 0.27 acre site with 0.15 acres of impervious area and 0.12 acres of pervious turf area in type B soils. Enter in the watershed information and change the name.
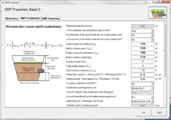
Step 22: Enter in the BMP design parameters into the BMP parameters tab. Bioretention basin with an underdrain requires the following entries.
- Is the underdrain elevated above native soils – Yes
- Are the sides of the basin lined with an impermeable liner – No
- Is the bottom of the basin lined with an impermeable liner – No
- Surface area of overflow - 1546 square feet
- Surface area at media surface - 1250 square feet
- Surface area at underdrain -1200 square feet
- Bottom surface area (area at media-soil interface) - 1110 square feet
- Overflow depth - 1 foot
- Total media depth - 3 feet
- Depth below underdrain - 1.3 foot
- Media field capacity minus wilting point - 0.15 cubic feet per cubic foot
- Media porosity minus field capacity - 0.35 cubic feet per cubic foot
- Is a tree(s) planted in the BMP – No
- Bioretention planting media mix - Media Mix C
- Is the P content of the media less than 30 mg/kg - auto fills to “Yes” for Media Mix C
- Is a soil amendment used – No
- Underlying soil – Hydrologic Soil Group - SM (HSG B; 0.45 in/hr) from the dropdown box
- Required drawdown time (hrs) - 48 from the dropdown box
Step 23: Close the BMP properties window for Basin 2 by clicking OK.
Step 24: Open the BMP properties for the green roof by right clicking on the Green roof icon and selecting Edit BMP properties, or by double clicking on the Green roof icon.
Step 25: Determine the watershed characteristic for the green roof. The watershed parameters for the green roof include a 0.02 acre site all impervious. Enter in the watershed information. Change the name and route the green roof to Basin 1.
Step 26: Click on the BMP Parameters tab and enter in the BMP design parameters. Green roof requires two entries.
- The media depth - 4 inches
- The surface area of the green roof - 871 square feet
Step 27: Close the BMP properties window for the green roof. Check the routing by looking at the Schematic tab to make sure all of the BMPs are routed correctly.
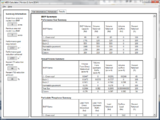
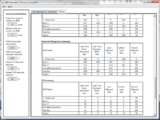
Step 28: Go to the Results tab and review the results.
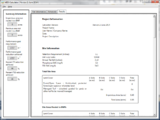
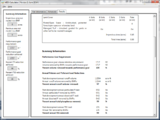
- MIDS calculator screen shots for Results tabs for this example. Click on an image for enlarged view.
This page was last edited on 1 December 2022, at 20:12.


