![]()
Difference between revisions of "Construction stormwater photo gallery - Buffer zones"
| Line 6: | Line 6: | ||
<gallery caption="These are some examples where effective buffer zone practices were used. Click on an image for more information." widths="180px"> | <gallery caption="These are some examples where effective buffer zone practices were used. Click on an image for more information." widths="180px"> | ||
| − | |||
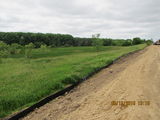
File:Bufferzone2.JPG|alt=Buffer zone around a wetland. | File:Bufferzone2.JPG|alt=Buffer zone around a wetland. | ||
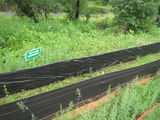
| + | File:Bufferzone1.JPG|alt=Buffer zone around a water body. | ||
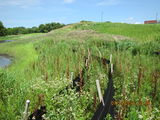
File:Bufferzone3.JPG|alt=Buffer zone around a water feature. | File:Bufferzone3.JPG|alt=Buffer zone around a water feature. | ||
Revision as of 15:17, 17 April 2019
This site is currently undergoing revision. For more information, open this link.
This page is currently undergoing revision
This page is currently undergoing revision
This page provides photos illustrating well implemented and poorly implemented buffer zone practices.
Examples of well implemented buffer zone practices
- These are some examples where effective buffer zone practices were used. Click on an image for more information.


Examples of failed mulch stabilization practices
- These are some examples where ineffective buffer zone practices were used. Click on an image for more information.