Design criteria for high-gradient stormwater step-pool swale
This page provides a discussion of design elements and design steps for high-gradient stormwater step-pool swale (step pools). The following discussion includes step pools used as filtration or infiltration practices, with the distinction being the presence of an underdrain for filtration practices.
Contents
- 1 Terminology
- 2 Details and CADD images
- 3 Design phase maintenance considerations
- 4 Major design elements - Physical feasibility initial check
- 4.1 Infiltration constraints
- 4.2 Contributing drainage area
- 4.3 Site topography
- 4.4 Site location/minimum setback
- 4.5 Depth to groundwater and bedrock
- 4.6 Karst topography
- 4.7 Wellhead protection areas
- 4.8 Soils hydrologic soil group mapping (link to “Design infiltration rates, in inches per hour, for A, B, C, and D soil groups” Table)
- 5 Major design elements - practice and site considerations
- 6 Materials specification
- 7 Design procedure – design steps
- 7.1 Step 1. Make a preliminary judgment
- 7.2 Step 2. Confirm design criteria and applicability
- 7.3 Step 3. Perform field verification of site suitability
- 7.4 Step 4. Select design variant based on physical suitability evaluation
- 7.5 Step 5. Compute runoff control volumes and other key design parameters
- 7.5.1 Map preliminary vertical (longitudinal profile) and horizontal (planform) alignments for the project
- 7.5.2 Design the typical cross-section for the riffle/cascade and pool channel segments
- 7.5.3 Design the in-stream weir tie-in structure (if applicable)
- 7.5.4 Check and adjust the design parameters based on project goals
- 7.6 Step 6. Check 2-year and 10-year velocity erosion potential and freeboard
- 7.7 Step 7. Design low flow control at downstream headwalls and checkdams
- 7.8 Step 8. Design inlets and sediment forebay(s)
- 7.9 Step 9. Check volume, peak discharge rates and drawdown time against state, local, and watershed organization requirements (NOTE: steps are iterative)
- 7.10 Step 11. Prepare vegetation and landscaping plan
- 7.11 Step 12. Prepare operation and maintenance plan
- 7.12 Step 13. Prepare cost estimate
- 8 Related pages
Terminology
The following terminology is used throughout this design page.
HIGHLY RECOMMENDED - Indicates design guidance that is extremely beneficial or necessary for proper functioning of the practice, but not specifically required by the MPCA CGP.
RECOMMENDED - Indicates design guidance that is helpful for practice performance but not critical to the design.
Details and CADD images
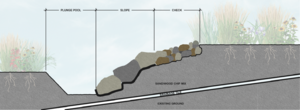
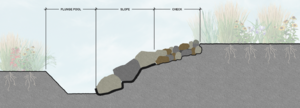
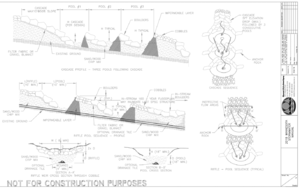
- Cascade profile, riffle pool sequence profile, riffle weir cross-section: File:Stormwater-Step-Pool.pdf
- Other details and CADD images for swales
- Swale layout: File:Swale Layout2 (1).pdf
- Typical dry swale profile section with check dams and draintile: File:MIDS Dry Swale Sections-SHEET 2.pdf
- File:MIDS Dry Swale Sections-SHEET 2 (2).pdf
- Typical grass channel cross-section without soil amendment: File:MIDS Dry Swale Sections-SHEET 1.pdf
- Typical wet swale check dam cross section, profile section with check dams, and profile section: File:MIDS WET Swale Sections SHEET 2 (1).pdf
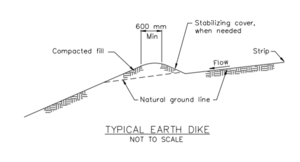
- Typical earthen, rock, structural check dams; profile and cross-section: File:VARIOUS CHECK DAMS Layout1 (1).pdf
- Typical wet and dry swale cross-sections: File:Wet and dry swales Layout2 (1).pdf
Click on file link to see all filtration CADD images in a combined pdf: File:All filtration cadd images combined 2.pdf
Design phase maintenance considerations
Implicit in the design guidance is the fact that many design elements of infiltration and filtration systems can minimize the maintenance burden and maintain pollutant removal efficiency. Key examples include
- limiting drainage area;
- providing easy site access (REQUIRED);
- providing pretreatment (REQUIRED); and
- utilizing native plantings (see Plants for Stormwater Design).
For more information on design information for individual infiltration and filtration practices, link here.
Major design elements - Physical feasibility initial check
Before deciding to use a stormwater step pool practice for stormwater management, it is helpful to consider several items that bear on the feasibility of using such a device at a given location. This section describes considerations in making an initial judgment as to whether or not stormwater step pool practice is the appropriate BMP for the site. The following links provide additional information on specific constraints to infiltration (applicable to stormwater step pools without an underdrain).
Infiltration constraints
If a step pool is being considered for infiltration, the following links provide additional information on specific constraints to infiltration. The Construction Stormwater General Permit prohibits infiltration under certain conditions, which are summarized and discussed in detail at this link.
- Karst
- Shallow soils and shallow depth to bedrock
- Shallow groundwater
- Soils with low infiltration capacity
- Separation distances
- Potential stormwater hotspots
- Wellhead protection
- Contaminated soils and groundwater
- Procedures for investigating sites with potential constraints
Contributing drainage area
The RECOMMENDED maximum drainage area is typically 5 acres when the practice is being used to achieve volume reduction and water quality improvements for compliance with the MPCA CGP.
Stormwater step pools are often used for drainage areas greater than 5 acres (up to 50 acres) as a practice that can be used to safely convey stormwater down a steep slope, gulley, or ravine while minimizing scour and channel erosion potential. However, as the drainage area increases over 5 acres, the ability of the practice to provide volume reduction and water quality benefits is diminished.
Site topography
Unless slope stability calculations demonstrate otherwise, it is HIGHLY RECOMMENDED that stormwater step pools be located a minimum horizontal distance of 200 feet from down-gradient slopes greater than 20 percent, and that slopes in contributing drainage areas be limited to 15 percent. Swale gradient is a primary driver of selection of stormwater step pools over wet or dry Swales. Proposed swale gradient and general soil erodibility should be considered at this stage, in conjunction with expected discharges, to decide if a stormwater step pool is preferable and feasible. For guidance on calculating slope stability, see [1], [2], [3].
Site location/minimum setback
For more information, link here.
Depth to groundwater and bedrock
A separation distance of at least 3 feet is REQUIRED under the MPCA CGP between the bottom elevation of a stormwater step pool and the elevation of the seasonally high water table.
Shallow bedrock areas should be avoided for stormwater step pools as infiltration practices with a minimum separation distance of 3 feet. A field soil properties investigation is HIGHLY RECOMMENDED.
Karst topography
It is HIGHLY RECOMMENDED that underdrains and an impermeable liner be used for stormwater step pools with filter media in karst terrain because infiltration is typically not allowed in karst areas. Geotechnical investigations are REQUIRED in karst areas.
Wellhead protection areas
See stormwater and wellhead protection for guidance and recommendations for determining the appropriateness of infiltrating stormwater in a Drinking Water Supply Management Area (DWSMA). For more information on source water protection see Minnesota Department of Health.
Soils hydrologic soil group mapping (link to “Design infiltration rates, in inches per hour, for A, B, C, and D soil groups” Table)
See NRCS Web Soil Survey for hydrologic soil descriptions for the stormwater step pool location. A and B soils are potentially suitable for a stormwater step pool without an underdrain (infiltration practice). C and D soils are potentially suitable for a stormwater step pool with an underdrain (filtration practice). The maximum allowed infiltration rate shall not exceed 8.3 in/hr.
Major design elements - practice and site considerations
Several considerations are made in this section for the conceptual design. Further design guidance and specifications are in the following sections.
Conveyance
It is HIGHLY RECOMMENDED that the designer provide non-erosive flow velocities within the stormwater step pool and at the outlet point to reduce downstream erosion. During the 10-year or 25-year storm (depending on local drainage criteria), discharge velocity should be kept below 4 feet per second for established grassed channels. Erosion control matting or rock should be specified if higher velocities are expected.
Pretreatment
Pretreatment prior to the stormwater step pool such as vegetated filter strips or side slopes, small sedimentation basins, water quality inlets, or other pretreatment BMPs should be evaluated. Pretreatment is REQUIRED for all infiltration and filtration devices.
Grading
Slope of stormwater step pool The longitudinal slope of a stormwater step pool may vary from 2 percent up to 10 percent and greater slopes if necessary. It is HIGHLY RECOMMENDED that the design engineer consider the expected watershed flow to be conveyed by the stormwater step pool in making this preliminary determination of design alternate. Final slope will depend on expected flow combined with maximum depth (to determine shear stress), bank/soil stability and practical D50 of rock for the site.
Stormwater step pool bottom It is HIGHLY RECOMMENDED that the stormwater step pool bottom be no less than 4 feet wide and sized with the relative stage-dependent flow driven cross-sectional area in mind. Maximizing the pool segments can reduce scour potential in steps and the next pool as well as increase water quality treatment potential.
Side slopes It is RECOMMENDED that the maximum side slopes within a stormwater step pool do not exceed 3H:1V and be designed with the relative stage-dependent flow driven cross-sectional area in mind.
Stormwater step pool depth Stormwater step pool depth will be estimated based on the relative stage-dependent flow driven cross-sectional area, rate control, and water quality needs. Use the proposed flow and velocity to determine whether the step pool will require scour protection. If scour protection is necessary, see potential erosion control methods.
Infiltration and filtration considerations The design engineer should review the results of the feasibility check to assist in the selection of stormwater step pool type. An additional consideration includes watershed soil transport to the site. Watersheds with unstable soils or lack of vegetative cover (e.g., construction, farmland and highly impervious surfaces) can generate and transport excessive sediments to the stormwater step pool that may affect both infiltration and filtration capacity. In these situations, pretreatment via sedimentation processes is REQUIRED. Another consideration is the level of compaction and structure of in-situ soils, when considering stormwater step pools. Construction of developments and roads, for example, significantly alter the parent state of native soils and therefore their hydrologic soil classification should be downgraded for feasibility study purposes.
Filter media
Filtration media is comprised of a combination of sand and organic material on top of a pea gravel bed that typically encases a perforated drain pipe. The media assists in the removal of fine particulate and dissolved pollutants, improving on the overall performance of stormwater step pools.
Underdrains
Underdrains are comprised of a perforated, level PVC pipe laid within filter media to convey runoff to either a stable day-lit area, a second form of treatment, or connected to the storm sewer. Solid-walled PVC section of piping area connected to the perforated drain pipe with a “tee” junction piece and extended to the stormwater step pool’s surface to serve as an inspection and cleanout access point. These observation/maintenance wells are spaced throughout the system. Underdrains may be required to increase drawdown within pool areas, thereby increasing storage capacity of the system.
Treatment
A stormwater step pool provides water quality treatment through sedimentation, infiltration, filtration (adsorption via carbon bonding to metals, or chemical interaction between iron and phosphorus, for instance) and, to a lesser extent, denitrification via biochemical mechanisms (nitrate conversion to nitrogen gas by bacteria). Stormwater treatment in stormwater step pools varies by design, relying on several functions. Organic and mineral sediments suspended in stormwater flows are deposited onto the stormwater step pool bottom, depending on their size and mass as well as water retention time in a process termed sedimentation. Though stormwater step pools generally do not detain or retain water for extended periods, this function can be enhanced through the use of impermeable check dams or weirs that hold back flows for a design period. Pollutant removal also occurs through sorption (absorption or adsorption) of particulate matter via the stormwater step pool soils and vegetation as water passes through the system. For stormwater step pools with or without filter media, a portion of the stormwater flows percolate through soil where fine particulate and dissolved pollutants are treated. In fully infiltrating soils, 100 percent of that portion of pollutant is removed from the surface conveyance to downstream waterbodies, though some shallow ground water connections to nearby water bodies or aquifers should be considered. For stormwater step pools with filter media and underdrains, a significant portion of particulate contaminants and some dissolved contaminants may be removed before being conveyed via drain pipe to downstream stormwater treatment practices or a receiving water body. The addition of an underdrain to the filter media facilitates conveyance but may transport dissolved phosphorus from media with higher phosphorus index or when soil particles reach a breakthrough point, where soluble phosphate, and other dissolved nutrients, will no longer be adsorbed and will pass through the soil (Erickson, Weiss, Gulliver, 2013). This problem can be remedied by the use of iron-, calcium-, aluminum-, or magnesium-enhanced sand in place of compost or peat-sand media. Stormwater step pools also provide some treatment through plant uptake of pollutants.
In most cases, stormwater step pools are not considered a volume reduction practice unless there is suitable in-situ soil for infiltration to occur (e.g. typically A or B soils), though some volume reduction can occur through evapotranspiration. For each treatment scenario being considered, the designer should conduct feasibility checks as appropriate at each design stage.
Vegetation
Vegetation plays a crucial role in stormwater step pool treatment capacity, flow attenuation and stabilization of the device (i.e., erosion control). It is HIGHLY RECEOMMENDED that preference is given to robust native, non-clump forming grasses and sedges as the predominant plant type within the stormwater step pool flow area. Care must also be taken to consider species selection in light of sun exposure duration/timing as well as soil moisture, ponding depth, ponding duration, and salt tolerance (where such deicing materials are used in the drainage area). As discussed above, while not desirable, some stormwater step pools will be used for snow storage; these areas should not be planted with woody vegetation.
Landscaping
Stormwater step pools can be effectively integrated into the site planning process and aesthetically designed as attractive green spaces planted with native vegetation. Because vegetation is fundamental to the performance and function of the stormwater step pool, appropriately chosen vegetation must be selected to withstand the expected depth and duration of flows, the calculated shear stress and duration of light exposure. Underdrains, if incorporated, may affect the drawdown time and media saturation times thereby impacting this selection.
Snow considerations
Considering management of snow, the following are recommended
- Plan a plow path during design phase and tell snowplow operators where to push the snow. Plan trees around (not in) plow path, with a 16 foot minimum between trees.
- Plan for snow storage (both temporary during construction and permanent). Don’t plow into stormwater step pools routinely. Step pools should be a last resort for snow storage (i.e. only for very large snow events as “emergency overflow”.
- Snow storage could be, for example, a pretreatment forebay for snow melt.
For more information and example photos, see the section on snow and ice management.
Safety
Stormwater step pools do not pose any major safety hazards. Potential hazards could occur from the steep side slope and rock checks of the stormwater step pools if they are close to pedestrian traffic or roadways with no shoulders.
Materials specification
Erosion control (MNDOT Standard Specifications 2575, 3861-3898)
The use of temporary erosion control materials is REQUIRED in the design and construction of all swale types to allow for the establishment of firmly-rooted, dense vegetative cover. The stormwater step pool bottom and side slopes up to the 10-yr event should use robust erosion control matting that can resist the expected shear stresses associated with channelized flows. The matting should have a minimum life expectancy of three years. Upper banks of the stormwater step pool slope should be protected by either similar matting or a straw/coconut blend erosion control blanket. See MNDOT specifications 2575 and 3861-3898 for guidance on selection of erosion control products.
Filter media
Filter media used in stormwater step pool designs should follow guidance on material specifications within the Bioretention section of the MN Stormwater Manual. Care must be taken to reduce the possibility of passing of dissolved nutrients when selecting drain tiles for inclusion within media.
Underdrains (MNDOT Specifications 3245, 3247, 3248, 3278)
The following are RECOMMENDED for infiltration practices with underdrains.
- The minimum pipe diameter is 4 inches.
- Install 2 or more underdrains for each infiltration system in case one clogs. At a minimum provide one underdrain for every 1,000 square feet of surface area.
- Include at least 2 observation/cleanouts for each underdrain, one at the upstream end and one at the downstream end. Cleanouts should be at least 4 inches diameter vertical non-perforated schedule 40 PVC pipe, and extend to the surface. Cap cleanouts with a watertight removable cap.
- Construct underdrains with Schedule 40 or SDR 35 smooth wall PVC pipe.
- Install underdrains with a minimum slope of 0.5 percent, particularly in hydrologic soil group D soils (Note: to utilize Manning’s equation the slope must be greater than 0).
- Include a utility trace wire for all buried piping.
- For underdrains that daylight on grade, include a marking stake and animal guard;
- For each underdrain have an accessible knife gate valve on its outlet to allow the option of operating the system as either an infiltration system, filtration system, or both. The valve should enable the ability to make adjustments to the discharge flow so the sum of the infiltration rate plus the underdrain discharge rate equal a 48 hour drawdown time.
- Perforations should be 3/8 inches. Use solid sections of non-perforated PVC piping and watertight joints wherever the underdrain system passes below berms, down steep slopes, makes a connection to a drainage structure, or daylights on grade.
- Spacing of collection laterals should be less than 25 feet.
- Underdrain pipes should have a minimum of 3 inches of washed #57 stone above and on each side of the pipe (stone is not required below the pipe). Above the stone, two inches of choking stone is needed to protect the underdrain from blockage.
- Avoid filter fabric .
- Pipe socks may be needed for underdrains imbedded in sand. If pipe socks are used, then use circular knit fabric.
The procedure to size underdrains is typically determined by the project engineer. An example for sizing underdrains is found in the North Carolina Department of Environment and Natural Resources Stormwater BMP Manual. Underdrain spacing can be calculated using the following spreadsheet, which utilizes the vanSchilfgaarde Equation. The spreadsheet includes an example calculation. File:Underdrain spacing calculation.xlsx
Rock
See MNDOT Standard Specification 3601.
Weir
See MNDOT Standard Specifications 2461, 2573, 3137, 3301, 3491, 3601.
Plants
See MNDOT Standard Specifications 2571, 2574, 2575, 3861, 3876, 3878.
Refer to the swales plant list section of the manual for selection of Minnesota native plants to be used in swales. Care must be taken to specify plants for their position in the system (swale bottom, side slopes and buffer). For the step pool bottom, preference should be given to robust non-clump forming grasses or sedges that can withstand flow forces as well as provide adequate filtration functions. It is also important to understand draw-down time not only within the channel itself, but in either in-situ soils or the filter media as plants have variable tolerance to the depth and duration of inundation as well as soil moisture period. Lastly, care should be taken to understand sun exposure and salt tolerance requirements of various plants to ensure a robust, dense establishment of vegetative cover.
Stormwater step pool materials specifications
Link to this table
| Parameter | Specification | Size | Note |
|---|---|---|---|
| Topsoil | Topsoil per MNDOT 3877 | n/a | Characteristic of local site soils |
| Media sand | ASTM C-33 fine aggregate concrete sand | 0.02” to 0.04” | |
| Check dam (pressure treated) | AWPA Standard C6 | 6” by 6” or 8” by 8” | Do not coat with creosote; embed at least 3’ into side slopes |
| Check Dam (natural wood) | Black Locust, Red Mulberry, Cedars, Catalpa, White Oak, Chestnut Oak, Black Walnut | 6” to 12” diameter; notch as necessary | Do not use the following, as these species have a predisposition towards rot: Ash, Beech, Birch, Elm, Hackberry, Hemlock, Hickories, Maples, Red and Black Oak, Pines, Poplar, Spruce, Sweetgum, Willow |
| Check dam (rock, rip rap) | Per local criteria | Size per requirements based on 10-year design flow | Cannot get water quality volume credit when using a permeable check dam |
| Check dam (earth) | Per local criteria | Size per requirements based on 10-year design flow | Use clayey soils with low permeability |
| Check dam (precast concrete) | Per pre-cast manufacturer | Size per requirements based on 10-year design flow | Testing of pre-cast concrete required: 28 day strength and slump test; all concrete design (cast-in-place or pre-cast) not using previously approved State or local standards requires design drawings sealed and approved by a licensed professional structural engineer. Embed at least 3’ into side slopes |
| Filter Strip sand/gravel pervious berm | sand: per dry swale sand gravel; AASHTO M-43 | sand: 0.02” to 0.04” gravel: 1/2” to 1” | Mix with approximately 25% loam soil to support grass cover crop; see Bioretention planting soil notes for more detail |
| Pea gravel diaphragm and curtain drain | ASTM D 448 | varies (No. 6) or (1/8” to 3/8”) | Use clean bank-run gravel |
| Underdrain gravel | per pre-cast manufacturer | 1.5” to 3.5” | |
| Underdrain | ASTM D-1785 or AASHTO M-278 | 6” rigid Schedule 40 PVC | 3/8” perf. @ 6” o.c.; 4 holes per row |
Design procedure – design steps
Step 1. Make a preliminary judgment
It is important to acknowledge that each site has unique and defining features that require site-specific design and analysis. The guidance provided below is intended to provide the fundamentals for designing stormwater step pool systems to meet regulatory requirements but is not intended to substitute engineering judgment regarding the validity and feasibility associated with site-specific implementation. Designers need to be familiar with the hydrologic and hydraulic engineering principles that are the foundation of the design and enlist the expertise of qualified individuals in stormwater management and stream restoration plantings with respect to developing appropriate planting plans and habitat improvement features.
Using the information collected in the initial feasibility check, make a preliminary judgment as to whether site conditions are appropriate for the use of a stormwater step pool and identify the function of the step pool in the overall treatment system.
A. Consider basic issues identified during the initial site suitability screening. Determine if there is sufficient room at the head of the swale to provide pretreatment and storm sewer outfall scour prevention, where applicable. Come to a preliminary decision on whether the site will allow for the physical construction of the stormwater step pool concept as well as where in the system (e.g., pools) infiltration could be incorporated and to what extent. For steps, consider the bank and soil stability and relative size of rock material based on expected watershed flows. For runs between steps and pools, if any, consider if meandering will allow for slope reductions that slow flows and potentially decrease rock sizing at steps. Consider how water will be conveyed below the bed of the stormwater step pool via a filtration bed and whether an underdrain will be necessary, as well as how daylighting any underdrain will need to be handled to eliminate scour potential.
B. Determine how the stormwater step pool will fit into the overall stormwater treatment system.
- Decide the location, extent and form of pretreatment required.
- If appropriate, determine whether the stormwater step pool has the potential to discharge to additional forms of treatment.
Step 2. Confirm design criteria and applicability
A. Perform an initial evaluation of performance related to water quality permit requirements (e.g. Construction stormwater permit). The MIDS Calculator may be used for this.
B. Check with local officials, watershed organizations, and other agencies to determine if there are any additional restrictions and/or surface water or watershed requirements that may apply.
Step 3. Perform field verification of site suitability
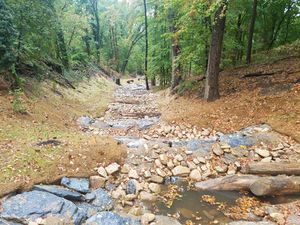
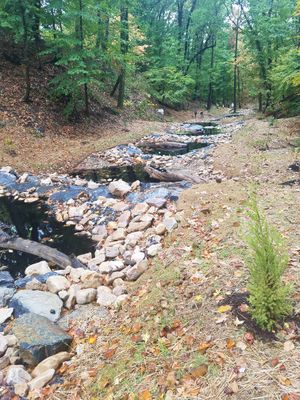
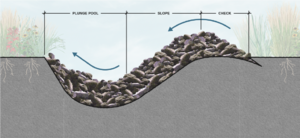
Stormwater step pools consist of an open channel conveyance with alternating riffles and pools. These systems are best suited for ditches, outfalls, ephemeral and intermittent channels with longitudinal profile slopes that are less than 10 percent. However, the design can be easily adapted for sites where the slope exceeds 10 percent. For these sites, the size and quantity of the cobbles and rows of boulders inherent in the design computations are increased to mitigate for the stability issues associated with steep slopes. It is noted that the utilization of two or more rows of boulders typically will result in a water cascade. In extreme slope situations (greater than 50 percent), the designer may elect to use imbricated riprap (stones are usually two to three foot long boulders that overlap and stack on top of one another to provide structural integrity), gabion baskets, retaining walls, drop storm drain structures or other structural/geotechnical slope treatment methods to safely traverse the grade.
Connection of high-gradient, stormwater step pools to downstream water resources must address potential problems such as erosion, buffer deficiencies, headcuts and infrastructure impacts that may affect stormwater step pool design and feasibility. For projects that drain to stream channels with active incisions, it is imperative that proper tie-in design be established between the stormwater step pool system and the connecting downstream channel. This could be accomplished by installing an in-stream weir at the proper elevation to promote upstream floodplain connection and prevent headcut erosion from unraveling the proposed stormwater step pool. An example design solution for tying the stormwater step pool with downstream incised perennial channel is presented in the swale CAD section (see image on right). It is noted that each case should be evaluated carefully and that design engineers propose appropriate solutions based on the individual circumstance surrounding each case. Additionally, the design engineer is responsible for notifying and obtaining all required approvals from the Local, State and Federal authorities.
Additional site suitability considerations include the following.
- Evaluation of in-situ soils for infiltration capacity. See Determining soil infiltration rates and Understanding and interpreting soils and soil boring reports for infiltration BMPs.
- Perform groundwater mounding analysis
Groundwater mounding, the process by which a mound of water forms on the water table as a result of recharge at the surface, can be a limiting factor in the design and performance of infiltration practices. A groundwater mounding analysis is RECOMMENDED to verify separation distances required for infiltration practices. For more information on groundwater mounding, see the following sections in this manual.
- Stormwater infiltration and groundwater mounding
- When should a mounding analysis be conducted?
- How to predict the extent of a mound
- Example mound calculations
Step 4. Select design variant based on physical suitability evaluation
Once the physical suitability evaluation is complete, it is HIGHLY RECOMMENDED that better site design principles be applied in sizing and locating the stormwater step pool on the development site. Given the drainage area and slope, select the appropriate practice for the first iteration of the design process. See Green Stormwater Infrastructure (GSI) and sustainable stormwater management.
Step 5. Compute runoff control volumes and other key design parameters
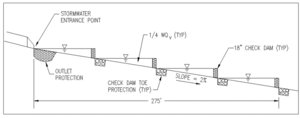
1. Calculate the following runoff control volumes.
- Calculate the Water Quality Volume (Vwq): If the swale is being designed to meet the requirements of the MPCA Permit, the REQUIRED treatment volume is the water quality volume of 1 inch of runoff from the new impervious surfaces created from the project. If part of the overall Vwq is to be treated by other BMPs, subtract that portion from the Vwq to determine the part of the Vwq to be treated by the dry swale.
- Vwq = 1 inch x Areaimpervious surface
- Calculate Channel Protection Volume (Vcp)
- Vcp = 24 hour extended detention of post-development 1-yr 24-hr storm event
- Calculate Overbank Flood Protection Volume (Vp10)
- Vp10 = peak discharge from the 10-yr storm to 10-yr predevelopment rates
- Calculate Extreme Flood Volume (Vp100).
- Vp100 = peak discharge from the 100-yr storm to 100-yr predevelopment rates
2. Once the runoff control volume is determined for design, compute the following design parameters to determine the swale size required.
- A. Calculate the maximum discharge loading per foot of swale width
\(q = (0.00236/n) · Y · 1.67 · S · 0.5 \)
Where:
- q = discharge per foot of length of the swale, from Manning’s equation (cfs/ft);
- Y = allowable depth of flow (inches);
- S = slope of swale (percent) (0.5 to 2 percent); and
- n = Manning’s “n” roughness coefficient (use 0.15 for short prairie grass, 0.25 for dense grasses such as bluegrass, buffalo grass, blue grama grass and other native grass mixtures).
- B. Use a recommended hydrologic model to compute Qwq
- C. Minimum swale length (in feet) = Qwq / q
Where:
- Qwq = the water quality peak discharge (cubic feet per second)
3.For stormwater step pools with a consistent cross-section, the water quality volume (Vwq) achieved behind each check dam (instantaneous volume) is given by
\( V_{wq} = h^2 * (h * H + B_w)]/(2S) \)
where
- h = check dam height (inches)
- H = horizontal component of the swale side slope (1 vertical : H horizontal)(inches)
- S = slope (unitless); and
- Bw = channel bottom width (inches)
For stormwater step pools with inconsistent or irregular cross-sections, calculate the volume of water in the pool below the flowline of the controlling check dam.
Add the Vwq for each check dam together to obtain the cumulative water quality volume for the swale.
Map preliminary vertical (longitudinal profile) and horizontal (planform) alignments for the project
- Measure the elevation difference “ΔE” between the top and the bottom of the proposed stormwater step pool. In the event that the proposed stormwater step pool connects to an incised downstream channel, the elevation of the floodplain terrace shall be used as the downstream elevation. An in-stream weir design with a top of weir elevation set at the floodplain terrace is necessary at the tie-in location.
- Compute the average outfall slope, S, by dividing ΔE by Ldesign.
- Stormwater step pool segments utilized for water quality shall not exceed 5 percent in longitudinal slope. If the overall slope exceeds 5 percent, estimate the length of boulder cascade to use for traversing the grade. Boulder cascades maybe placed at 2H:1V or 50 percent slope. A maximum 5 foot of vertical drop shall be permitted at any single cascade location. Multiple cascades maybe required along the length of the project to traverse steeper grades. The location of the cascade shall be selected to minimize site disturbances and environmental impacts.
- Assume that the length of the pools is equal to the length of the riffles at 10feet. The minimum length of pools and riffles shall not be less than 10 feet.
- Assume a fixed one foot drop along the length of the riffle.
- Assume a minimum 18 inch fixed pool depth.
- Assume no elevation drop along the length of the pool to allow for dead storage ponding and promote filtration/infiltration.
- Alternate pool and riffle channels using an even length distribution along the horizontal alignment. Three consecutive pools separated by cobble riffle grade control structures shall be used following a cascade.
- Using the assumptions above, ΔE-ΔEcascade in feet will equal the number of riffle channels and associated pools.
- Boulders shall be used in-stream to transition the in-stream weir with the downstream bed elevation. A maximum 5 percent longitudinal profile slope shall be used to establish the grade transition.
Design the typical cross-section for the riffle/cascade and pool channel segments
- The riffle/cascade and pool channels shall be parabolic in shape.
- Design the riffle/cascade and pool channels to carry the Qdesign for the unmanaged 100-year storm flow in a parabolic shape. The area is given as
\( Area = 2WD / 3 \)
and the hydraulic radius of a parabola is given by
\( Hydraulicradius = (2W^2D)/(3W^2 + 8D^2) \)
where
- W = width of the riffle or pool section; and
- D = depth of the riffle or pool.
- The minimum freeboard for lined waterways or outlets shall be 0.25 feet above design high water in areas where erosion-resistant vegetation cannot be grown and maintained. No freeboard is required if vegetation can be grown and maintained. (USDA, 2006.)
- Select a trial constructed riffle channel width (W). The width is the dimension perpendicular to the flow.
- Select a trial constructed riffle channel depth (D). The Width/Depth ratio shall not be less than 2.
- The dead storage depth within the pool shall not be considered when checking for adequacy of conveyance.
- Design using a trial cobble with a d50 of 6 inches. The density of the stone shall be specified. The depth of the cobble material is equal to 2 x d50 (MDSHA, Highway Drainage Manual, 1981). Boulders shall be used to line cascade segments.
- Calculate the Manning’s n roughness coefficient based on the constructed depth, D, associated with the 100-year ultimate flow conditions and the cobble size (USDA, 2006)
\( n = D/6 (21.6 log(D/D_{50} + 14) \)
where
- n = Manning’s n, use 0.05 for cascades;
- D = depth of water in the riffle channel associated with unmanaged;
- 100-year Q design, ft; and
- D50 = cobble size, ft.
- Use the Manning formula to calculate the flow and velocity associated with the trial parameters D, W, and d50. The design flow shall meet or exceed the 100-year ultimate flow conditions.
\( Q = (1.49/n) A Rh^{2/3} S^{1/2} \)
where:
- Q = 100 year ultimate flow (cfs);
- 1.49 = conversion factor;
- n = Manning’s n, determined by USDA, 2006 equation;
- A = cross-section area of a riffle channel, which for a parabola = 2/3(W)(D), where W is top constructed width (ft) and D is the constructed depth (ft);
- Rh = hydraulic radius (ft), calculated using Chow 1959 relationship for parabolas;
- S = average slope over entire length of project (ft/ft); and
- V = velocity in the riffle channel (ft/sec), V = Q/A.
- Using small incremental depths (0.1 foot), develop a hydraulic rating curve/table for the channel to ensure that subcritical flow conditions prevail to the greatest extent possible. This is achieved by calculating the Froude Number, Fr. A Froude number exceeding 1 indicates that the flow is supercritical. A Froude number of less than 1 indicates that the flow is subcritical in nature. The Isbash coefficient for high turbulence should be used when sizing the cobble stones to accommodate supercritical conditions. Increasing the cobble size or the width depth ratio of the riffle channel can increase roughness and reduce velocity. This can further assist in meeting subcritical flow conditions. Refer to the design example at the end of this document for an example of a hydraulic rating curve table.
\( F_r = V / (gD)^{1/2} \)
| Cobble size (D_{50} in inches) | Allowable velocity (ft/s) |
| 4 | 5.8 |
| 5 | 6.4 |
| 6 | 6.9 |
| 7 | 7.4 |
| 8 | 7.9 |
| 9 | 8.4 |
| 10 | 8.8 |
| 11 | 9.2 |
| 12 | 9.6 |
| 15 | 10.4 |
- The design velocity shall be checked to ensure that it is below the maximum allowable velocity estimated from the Isbash formula below (NRCS, 2007). A graphical solution of the Isbash formula is also shown. This will be an iterative design process. Spreadsheets can be used to streamline the calculations.
\( Maximum allowable velocity = C ((2g ((ρ_s - ρ_w)ρ_w))1/2 D_{50}^{0.5} \)
where
- C = 0.86 for prevailing supercritical flow and 1.2 for prevailing subcritical flow;
- g = 32.2 ft/sec2;
- ρs = stone density (lb/ft3);
- ρw = water density (lb/ft3); and
- D50 = cobble stone diameter (ft)
Alternatively, the maximum allowable velocity by rock size may be determined from the cobble size (see table at right).
- The constructed depth of the typical pools (hf) and the pool directly following a cascade (hf cascade) shall not be less than 18 inches and shall not exceed 4 feet. This will result in a pool geometric design with less than 4 feet of embankment. The minimum design depth of the pools shall be estimated based on the use of the solved form of the Bernoulli conservation of energy equation shown below. The Bernoulli equation was solved to achieve a pool channel velocity of 4 feet per second. D and V correspond to the riffle/cascade channel design depth and velocity respectively.
\( h_f or h_{fcascade} = D + (V^2 /2g) - 0.25 \)
| Item | Check |
| Hydrology | Delineate drainage area, landcovers, and soil to the most downstream point of the RSC System. |
| Develop TR55/TR20 model run to calculate the predevelopment and post- development peak discharges. | |
| Utilize TR-55 to calculate the required water quality volume and water quantity volume of storage to be controlled within the system. | |
| Conduct a downstream investigation to check the adequacy of the outfall system. | |
| Hydraulics | Check the conveyance design (width, depth, slope) to ensure safe conveyance of the 100-year storm over the riffle/weir/cascade channels and that stable design dimensions for the cobbles and sandstone boulders are provided. |
| Check the calculated minimum pool depth to ensure that sufficient pool depth is provided to dissipate the upstream energies properly. | |
| Check the post-development stream power for the 100-year storm to ensure that it is rendered equal to the predevelopment stream power. (Note: this requires that sufficient RSC length and number of pools be provided) | |
| Check that the storage volume within the pools and voids meet the required quantity management storage volume prescribed for the project and calculated using, at minimum, TR-55. | |
| Alignment | Does the alignment follow the natural drainage path and are efforts made to avoid impacts to natural resources such as trees and wetlands? |
| Tree protection | Have specimen trees been identified and a tree protection plan been developed? |
- To ensure stability, the pools shall be constructed with a minimum side slope of 3H:1V.
- The sand/wood chip filter media shall meet the MNDOT specifications for sand. Sand shall conform to MNDOT Specifications, Division III.3131.2 Coarse Sand. Sand substitutions such as Diabase and Graystone are not acceptable. No calcium carbonated or dolomitic sand substitutions are acceptable. No “rock dust” can be used for sand. The woodchips are added to the sand mix, approximately 20 percent by volume, to increase the organic content and promote plant growth and sustainability.
- The minimum depth of the sand/woodchip mix filter media, df, below the invert of the pools, shall be 18 inches.
- Filter fabric shall be placed under all boulders. Refer to design figures for placement location. To prevent undercutting, a continuous sheet of filter fabric shall be used along the cross-section.
- Boulders serve as the weir component of the riffle grade control structure. The boulders should be arranged in a curved manner as shown on the riffle pool sequence schematic and the weir elevation view. This arrangement is intended to encourage flow deflection to the center of the pool and the creation of ineffective flow areas near the channel banks. To achieve this, the boulders shall be arranged horizontally in the center of the channel and the arms on either side of the channel shall be extended parabolically/ approximately 20 degree angle longitudinally to the center of the pool. The sandstone boulders should be sized by the engineer to be at least 3 to 4 times heavier than the riffle channel cobble. Typically, the diameter of boulders shall not be less than 2 feet in length. The typical boulder size shall be designed and specified on the plans by the engineer to best fit the channel shape. i.e., smaller cross-sections will require smaller boulders, while larger channel cross-sections may require larger boulders. The boulders should be tabular in shape to allow for maximum interlocking.
- The footer rocks provide added stability to the boulder in the event that excessive erosion is experienced in the energy dissipation pools. The footer rocks may not be necessary in the event that the utilized boulders size is adequately anchored (six inches below the lowest elevation point in the pool). The footer rocks shall be equivalent in size to the boulders and should be tabular in shape to allow for maximum interlocking. Footer rocks shall be anchored 6 inches below the lowest elevation point within the pool.
Design the in-stream weir tie-in structure (if applicable)
- The in-stream weir shall be set approximately 30 feet downstream of the tie-in location. The top elevation of the weir shall be set at the desired/historic floodplain elevation as determined appropriate by the engineer and approval authority. This is intended such as to impede headcut through the stormwater step pool and inundate the floodplain for all flows above the base-flow conditions, thus enhance the water quality conditions. To avoid the creation of a high hazard dam condition, the maximum height of the weir shall not exceed 3 feet. Multiple weirs, not to exceed 3 feet in height, may be required upstream to traverse the grade gradually and connect incised channels to the floodplain.
- The in-stream weir shall be connected longitudinally to the downstream existing grade through a maximum 5 percent slope boulder channel. This will ensure that flow velocities do not impede the fish passage (if applicable).
- Filter media shall be used for filling the stream bed to the desired elevation. Sand bags utilized as part of the erosion and sediment control plan for creating instream diversion maybe left in place. Geotextile shall be used to separate the sand fill and the overlay boulders that line the channel. The boulders shall extend in cross-section to the 100-year floodplain elevation.
- The in-stream boulders shall be sized such as to remain in place under the 100-year velocity and shear stress, and shall be placed in a manner such as to create maximum hydraulic friction.
- The last one or two structures within the stormwater step pool may be inundated by the in-stream 100-year flood elevations.
Check and adjust the design parameters based on project goals
Step 6. Check 2-year and 10-year velocity erosion potential and freeboard
Check for erosive velocities and modify design as appropriate based on local conveyance regulations. Provide 6 inches of freeboard.
Step 7. Design low flow control at downstream headwalls and checkdams
Design control to pass Vwq in 48 hours.
Step 8. Design inlets and sediment forebay(s)
Inlets to stormwater step pools must be provided with energy dissipaters such as riprap or geotextile reinforcement. Pretreatment of runoff is typically provided by a sediment forebay located at the inlet. Enhanced swale systems that receive direct concentrated runoff may have a 6-inch drop to a pea gravel diaphragm flow spreader at the upstream end of the control. A pea gravel diaphragm and gentle side slopes should be provided along the top of channels to provide pre-treatment for lateral sheet flows.
Step 9. Check volume, peak discharge rates and drawdown time against state, local, and watershed organization requirements (NOTE: steps are iterative)
General considerations
Follow the design procedures identified in the Unified Sizing Criteria section of the Manual to determine the volume control and peak discharge requirements for water quality, recharge (not required), channel protection, overbank flood and extreme storm.
Model the proposed development scenario using a surface water model appropriate for the hydrologic and hydraulic design considerations specific to the site. This includes defining the parameters of the stormwater step pool practice defined above:
- ponding elevation and area (defines the ponding volume);
- filtration rate and method of application (effective filtration area); and
- outlet structure and/or flow diversion information.
The results of this analysis can be used to determine whether or not the proposed design meets the applicable requirements. If not, the design will have to be re-evaluated.
A. Volume: Volume reduction may be achieved where in-situ soils, depth to bedrock and depth to groundwater are suitable (see Design criteria for infiltration), though gradients dictating the use of stormwater step pools may limit actual infiltration potential as well as present bluff instability risks. Therefore, it is advisable that stormwater step pools be designed to filter the water quality volume of runoff as opposed to relying on infiltration. Stormwater step pool systems shall be sufficient to filter a water quality volume of 1 inch of runoff from the new impervious surfaces created by the project. If this criterion is not met, increase the storage volume of the filtration practice or treat excess water quality volume (Vwq) in an upstream or downstream BMP (see Step 5).
B. Drawdown: Filtration practices shall discharge through the soil or filter media in 48 hours or less. Additional flows that cannot be infiltrated or filtered in 48 hours should be routed to bypass the system through a stabilized discharge point.
Experience has demonstrated that, although the drawdown period is 48 hours, there is often some residual water pooled in the infiltration practice after 48 hours. This residual water may be associated with reduced head, water gathered in depressions within the practice, water trapped by vegetation, and so on. The drawdown period is therefore defined as the time from the high water level in the practice to 1 to 2 inches above the bottom of the facility. This criterion was established to provide the following: wet-dry cycling between rainfall events; unsuitable mosquito breeding habitat; suitable habitat for vegetation; aerobic conditions; and storage for back-to-back precipitation events. This time period has also been called the period of inundation.Special considerations for stormwater step pools
- If the required Vwq and Rev are not met by the proposed design, then increase the filtration capacity by adjusting the depth of pools, width of sand/woodchip mix filter, or length of the facility. If these adjustments are not feasible, utilize other BMP measures to provide the remaining water quality volume.
- In situations where the existing soil underlying the proposed practice is confirmed through testing or borings to be highly infiltratable, the designer may utilize the water quality sizing criteria for an infiltration basin in lieu of filtration. This is prescribed so the designer engineer is not forced, under certain circumstances, to replace highly infiltratable native soil with non-native filter bed material.
- The proposed stormwater step pool will satisfy peak management flow requirements if two conditions are met:
- First, adequate storage volume within the pools and sand/woodchip voids is provided to meet the required storage volume/quantity management for the project
- Second, it is demonstrated that the design renders the hydraulic power equivalent to the predevelopment/desired hydraulic power through the proposed energy dissipation pools.
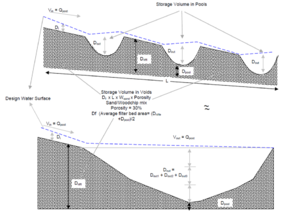
- To achieve the conditions above, the designer must compare the required peak management storage volume with the combined volume within the pools and the volume in the voids within the sand/woodchip mix. A 30 percent porosity shall be used for the sand/woodchip mix to calculate the volume within the voids. The selected design for the stormwater step pool must be checked using the conservation of energy principles to ensure that the hydraulic power is adequately reduced to design/predevelopment levels. This is achieved by equating the predevelopment or reference condition hydraulic power to the post development hydraulic power and solving for the equivalent added stream length/volume of storage needed to render this power to the desired condition. The conservation of energy principles are then utilized to convert the energy loss within this horizontal length to an equivalent vertical drop. The vertical drop is then converted to multiple drops that are distributed along the system in a manner that result in the least site disturbances. The provided quantity/volume of pools is then compared with the calculated quantity/volume of pools. If the provided pool storage is less than the computed/required pool storage, then additional stormwater step pool design measures or additional upland management strategies must be taken to reduce the inflow and in turn the hydraulic power. Refer to the figure on the right for a demonstration of the stormwater step pool provided volume of storage and input parameters for the conservation of energy computations. It should be noted that equating the geometric configuration of a multiple pool system to one pool with an area equal to the cumulative areas within the individual pools is a conservative measure and is used to simplify the hydraulic power routing computations. It is expected that cumulative roughness and headloss within the multiple pool configuration to be much higher than the individual pool configuration.
- The following steps should be followed in checking the before/after hydraulic power:
- Compute the predevelopment/design and post development hydraulic powers by substituting the predevelopment and post development discharges in terms of Q in the hydraulic power equation. The hydraulic power, expressed in the units of pounds per second, is given by
\(Hydraulic Power = ρ Q S \)
where
- ρ = is the unit weight of water = 62.4 lb/ft3;
- Q = corresponds to the Atlas 14 event discharge; and
- S = is the slope of the outfall channel in percent.
- Equate the pre-development design and post-development hydraulic powers and solve for the needed added stream length
\( ρ Q_{pre} (ΔE/L_{pre}) = ρ Q_{post} x (ΔE/L_{post} \)
- The elevation difference between the top and bottom of the project and the unit weight of water will remain constant, therefore, the channel protection requirement could be expressed in terms of a required additional stream channel length Ladd needed to render the post development hydraulic power equivalent to the pre-development hydraulic power, which is given by
\( L_{add} = L_{pre} (Q_{post} / Q_{pre}) - L_{pre} \)
- The required head loss due to friction through the stormwater step pool system can be calculated using the Darcy-Weisbach equation. By substituting Ladd for L, this headloss becomes equivalent to the energy loss within an added stream channel of length Ladd. The friction factor can be calculated using established relationships between Darcy-Weisbach friction factor and the Manning friction coefficient listed in Chow, 1959. The Darcy –Weisbach headloss equation is given by
\( Friction head loss = fL_{add}V_{out}^2 / 2D_{out}^g \)
- By substituting the required headloss term in the Bernoulli conservation of energy equation, the total combined design depth in ft of all proposed pools shall be at least equal to the “Dout” term embedded in the Bernoulli conservation of energy equation depicted below. If the total combined depth in ft of all proposed pools is less than the calculated “Dout” term, then additional pools are required or alternatively the pools could be made deeper. Solve for the “Dout” term using trial and error techniques or available commercial solver functions/calculators, (e.g., Microsoft Excel). The general and solved forms of the Bernoulli conservation of energy equation are shown below.
The general form of the Bernoulli Equation is given by: (Potential + Kinetic + Static) Energies SPSC entrance = (Potential + Kinetic + Static) Energies stormwater step pool outlet + Head loss within stormwater step pool system
The solved form of the Bernoulli Equation is given by
\( D_{in} + ((9Q^2) / (4gD_{in}^2W_{in}^2)) = ΔE = D_{out} + ((9Q^2)/(4gD_{out}^2W_{out}^2)) + ((9fL_{add}Q^2)/(4gD_{out}^3W_{out}^2)) \)
where
- Ladd = additional channel length (ft) required to render the post development power to predevelopment conditions;
- Vin = Design velocity at entrance riffle = V;
- Din = Design depth at entrance riffle = D;
- Win = Design width of riffle = W;
- Wout = Width of the pool (ft);
- Vout = typical velocity of flow (ft/sec) in the pool, this term is unknown in the Bernoulli equation. Using flow continuity principals, this term could be expressed in terms of the CPV design discharge, Dout, and Wout;
- g = acceleration due to gravity = 32.174 ft/sec2; and
- Dout = Solve for combined depth of flow in all pools (ft) and compare to the total provided pool depth.
Step 10. Finalize the cross-section and profile design for the project
Grading plan: Develop a grading plan based on the preliminary profile and cross-section typical design.
Dimensions: Adjust the preliminary profile dimensions to accommodate site specific concerns/impacts. Minimum design parameters for hydraulic, water quality, and quantity management criteria should be rechecked based on adjustments to the riffle/pool channels to ensure that safe and adequate conveyance is still maintained.
Rock checks: Adjust the preliminary rock check dimensions to accommodate site specific concerns/impacts. Minimum design parameters for hydraulic, water quality criteria should be rechecked based on adjustments to the channels profile and bank and bed stability to ensure that safe and adequate conveyance is still maintained.
Filter bed: The sand/woodchip mix filter bed shall have a minimum depth of 18 inches under the riffle channel and a minimum width of 4 feet and shall be placed as the substrate drainage material along the entire project length. The actual dimensions of the sand/woodchip mix filter bed will be determined based on the required water quality volume. Typically, construction of the step-pool system shall begin at the downstream end and proceed upstream to the project outfall. The outlet pool is designed to be placed at the lowest point in the project reach. This is often in the receiving wetland or stream/ floodplain, but can also be located in upland settings where the stormwater step pool system discharges to another stormwater BMP or adequate storm conveyance system.
Footer boulders: Footer boulders shall be placed at the interface of the pools and riffles. Additional boulders shall be placed on top of the footer boulders at the weir elevation upstream of the footer boulders to form the riffle channel parabolic shape.Continue the process of alternating pools and riffles up through the system to the entry pool. If the entry pool ties to an existing pipe outfall, additional armoring of the pool maybe needed to address the pipe exit velocities associated with supercritical hydraulic conditions. The designer may elect to use a larger size pool at the project entry to dissipate the outfall velocity and/or to address pretreatment concerns.
Upstream drainage: If the stormwater step pool is proposed downstream of a pipe system, it is desirable that the top invert of the weir associated with the entry pool is set at or above the invert of the discharge pipe or culvert. It is the responsibility of the design engineer to check the adequacy of the upstream drainage system
Site stabilization: Course woodchips and compost should be used throughout the limit of disturbance for site stabilization. All areas should be seeded and planted as well as blanketed/matted. Jute blanket should be used within the stormwater step pool bottom and side slopes. Erosion control blanket with biodegradable netting can be used above the side slopes within the floodplain.
Excess materials: It is advisable that excess materials, i.e., cobbles and boulders, be placed at the edge of the cross-section for use during the maintenance phase to correct any physical instability.
Step 11. Prepare vegetation and landscaping plan
A landscaping plan for a stormwater step pool should be prepared to indicate how the enhanced system will be stabilized and established with vegetation. Landscape design should specify proper species and based on specific site, soils, sun exposure and hydric conditions present along the channel. Further information on plant selection and use can be found here.
Step 12. Prepare operation and maintenance plan
See Operation and Maintenance section for guidance on preparing an O&M plan.
Step 13. Prepare cost estimate
See Cost Considerations section for guidance on preparing a cost estimate that includes both construction and maintenance costs.
Related pages
- Terminology for high-gradient stormwater step-pool swale
- Overview for high-gradient stormwater step-pool swale
- Types of infiltration
- Types of filtration
- Design criteria for high-gradient stormwater step-pool swale
- Construction specifications for high-gradient stormwater step-pool swale
- Operation and maintenance of high-gradient stormwater step-pool swale
- Assessing the performance of high-gradient stormwater step-pool swale
- Check dams for stormwater swales
- Plants for swales
- Calculating credits for high-gradient stormwater step-pool swale
- Cost considerations
- External resources for high-gradient stormwater step-pool swale
- References for high-gradient stormwater step-pool swale
Stormwater step pools are currently not included as a BMP in the MIDS calculator. The swale main channel BMP can be used, but the maximum allowable slope is 4 percent. To dtermine volume retention for slopes greater than 4 percent, you will need to develop a relationship between the slope and volume retained. To do this, determine volume retention at 0.5 percent slope increments for your site at slopes ranging from 0.5 to 4 percent. Determine the appropriate regression for volume retention and slope and calculate the volume retained at the slope for your site. The relationship is not linear. Links to MIDS calculator information are provided below.
- Requirements, recommendations and information for using dry swale (grass swale) without an underdrain in the MIDS calculator
- Requirements, recommendations and information for using dry swale (grass swale) with an underdrain in the MIDS calculator
- Requirements, recommendations and information for using swale side slope as a BMP in the MIDS calculator

